High color rendering LED

I will use the high color rendering LEDs sold by DigiKey.
Here are the specifications.

Current: 150mA
Voltage: 3V
Color temperature: 5700K
CRI:90
Illuminance (Typ): 64lm
Shape: 2835 size
Worry about heat dissipation

I arranged four vertically and eight horizontally. There are 32 LEDs in total. Since each LED is 64lm, 32 LEDs are 2048lm, which is twice as bright as Daiso's LED fluorescent tube straight tube.
The power consumption is 0.5W per LED, so the total is 16W. When 16w of heat is generated, it seems that the normal PCB does not radiate the heat and the PCB will get hotter.
Aluminum PCB

Aluminum PCB uses aluminum as the base of the substrate. Aluminum spreads heat quickly and does not stay in one place, so it has good heat diffusion and high heat dissipation. The substrates for lighting equipment such as LED ceiling lights are now mostly aluminum PCB. In this PCB construction, an insulating layer is placed on an aluminum plate, and then a copper foil layer is placed on top of it. Therefore, it should be designed as a single-sided substrate. Through-hole vias cannot be used either. PCBWay, design parameters look like this.
Unlike a typical glass epoxy substrate, the key point to note is that the minimum drill diameter is 0.8 mm I guess that means up to. Normally we can get up to 0.3 mm, but the hole is larger at 0.8 mm.
The width of the wiring and the spacing between the wirings are 4mil, which is the same as a normal PCB.
So...
Design with KiCad

Once I know the settings, all I have to do is design and wire. It's just a resistor and an LED, so it's pretty easy.

It's going to look like this, a white aluminum board.
Order to PCBWay

I am going to make aluminum PCB PCBWay to place an order this time. This is the first time I've used PCBWay.
The web pages can be displayed in English, Russian, Spanish, French and Japanese.
Member registration
If you have not yet registered as a member, create an account.

After registration, set the shipping address.

Click "My PCB Way" in the upper right corner of the screen, and then click "Delivery Address".
Click "Add new address" to set the address and other settings.

I'm guessing that the word "都会" means [City]. Character search is possible, so please enter your home zip code without hyphens. It's easy to find.
Enter your phone number in "Mobile" and your email address in "Email". Check that you have entered the correct information, and then click "Submit" to complete the settings.
Settings for manufacturing PCB

Set the PCB to be manufactured. Gerber files will not be sent at this time. This is different from Fusion PCB and JLC PCB.
Since it is an aluminum substrate, select aluminum as the material. You can set whether the copper foil, resist, or silk printing is on the top or bottom side.
If you are satisfied with the settings, click "Add to cart" on the right.
Upload Gerber file

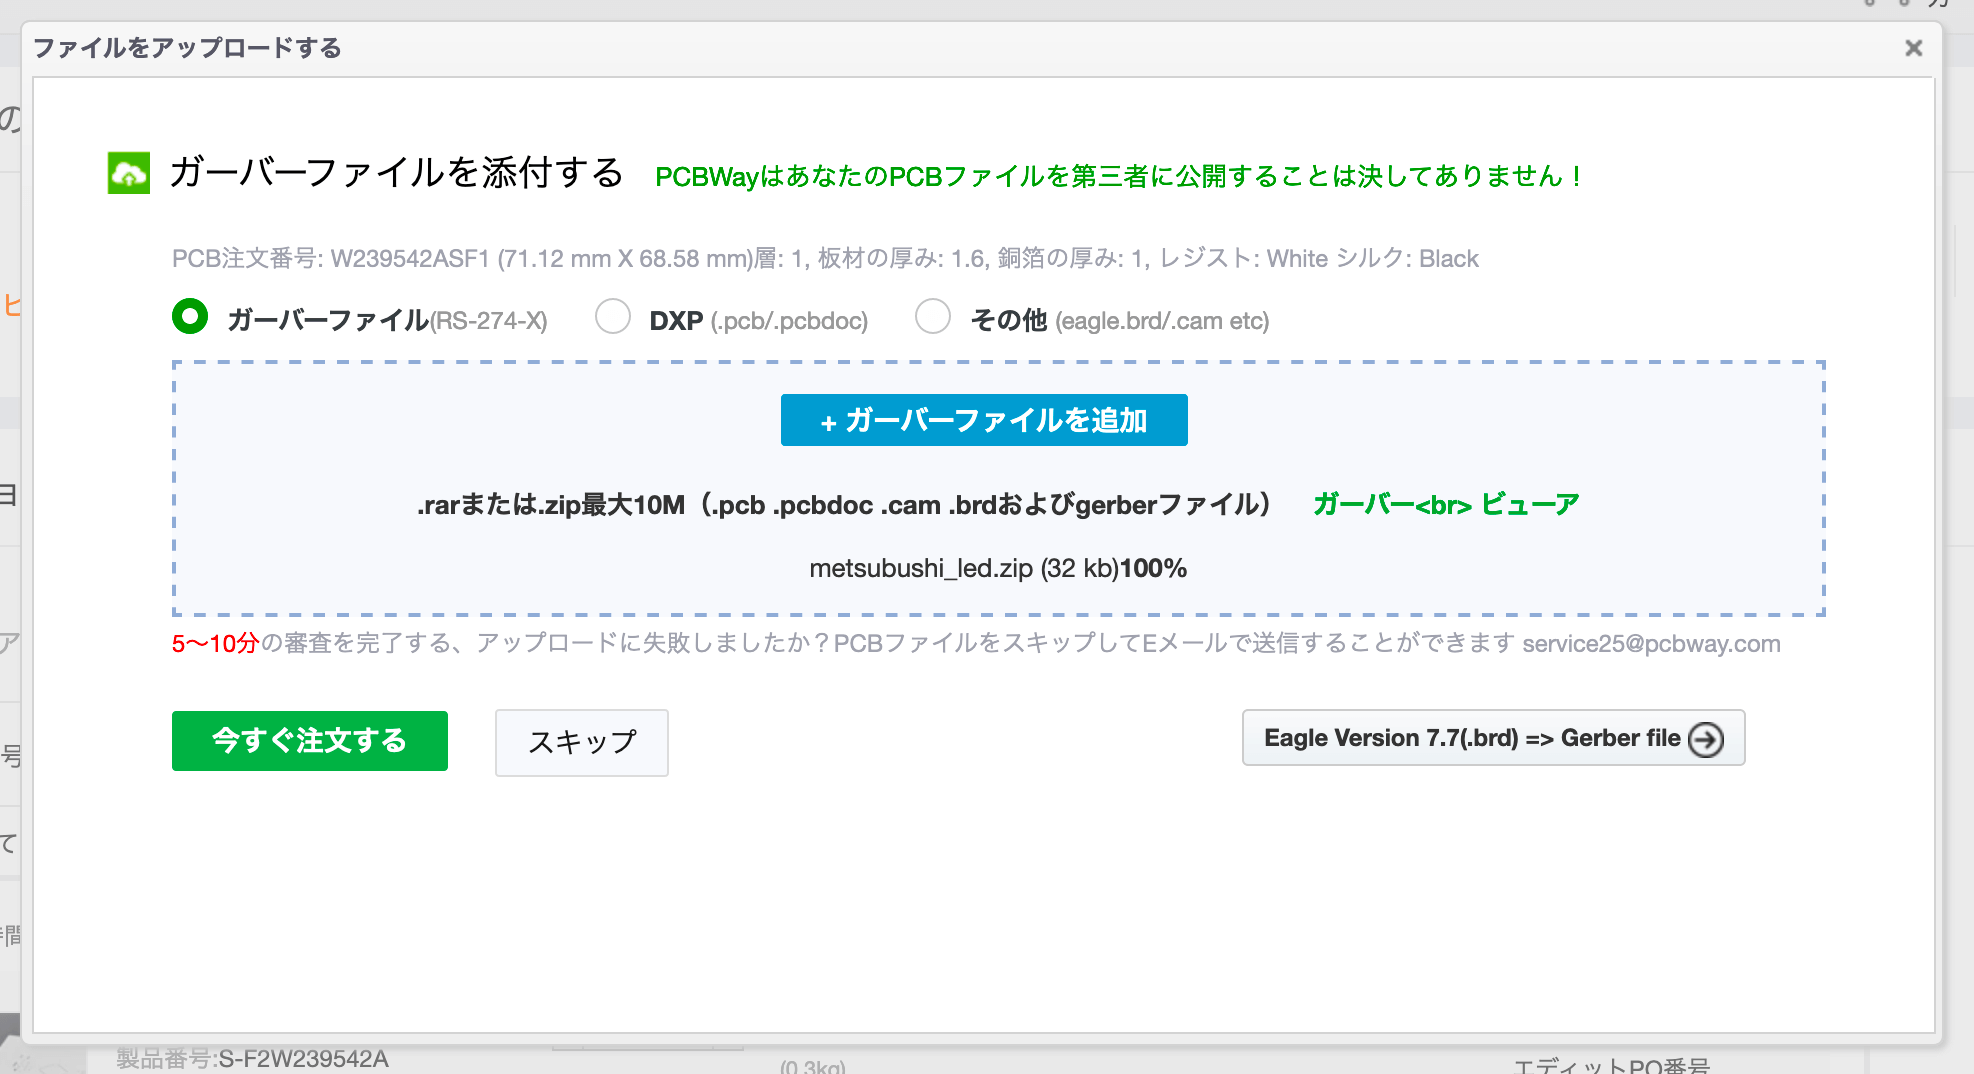
Upload the Gerber file here. Zip all the Gerber data into a single file and click "Add Gerber File" to upload it.
After uploading, click on "Order Now" to proceed.
Waiting for data verification

Once the Gerber file is uploaded, PCBWay will begin checking the data. There is 2 in "Under review" of "My order".
Wait as it is for the review to finish. In my case, I uploaded it around 11 o'clock, the review was completed around 1 o'clock, and I was waiting for payment. You don't have to stick to the screen to be informed by email when the review is done.

Click on "Waiting for Payment" or "Waiting for Unfinished Payments" to choose your payment method.
I think you can choose "PayPal", "Bank transfer" or "Credit card". If you pay here, all you have to do is wait for manufacture and shipping.
Shipping

What a surprise, it was shipped the day after I ordered it !。PCBWay super fast work !
I'm looking forward to receiving the PCB.


