

Christmas wreath made from printed circuit boards

I designed a Christmas wreath on a printed circuit board using the gold of copper foil, the red of resist, and the white of silk. It also has a circuit with a flashing LED. You can read more about how to make this design PCB in this article.

In this article, we will explain how to assemble a Christmas wreath.
In this article, we will explain how to assemble a Christmas wreath.
・Soldering iron
This soldering iron is temperature-controlled and heats up to the desired temperature immediately, so it heats up as soon as it is plugged in, making it a convenient soldering iron to use for soldering work. Also, even when soldering large terminals, the temperature recovers quickly and is very easy to solder.
・solder
It can be lead-free or lead-containing.
・Nippers
Assembly
Resistance
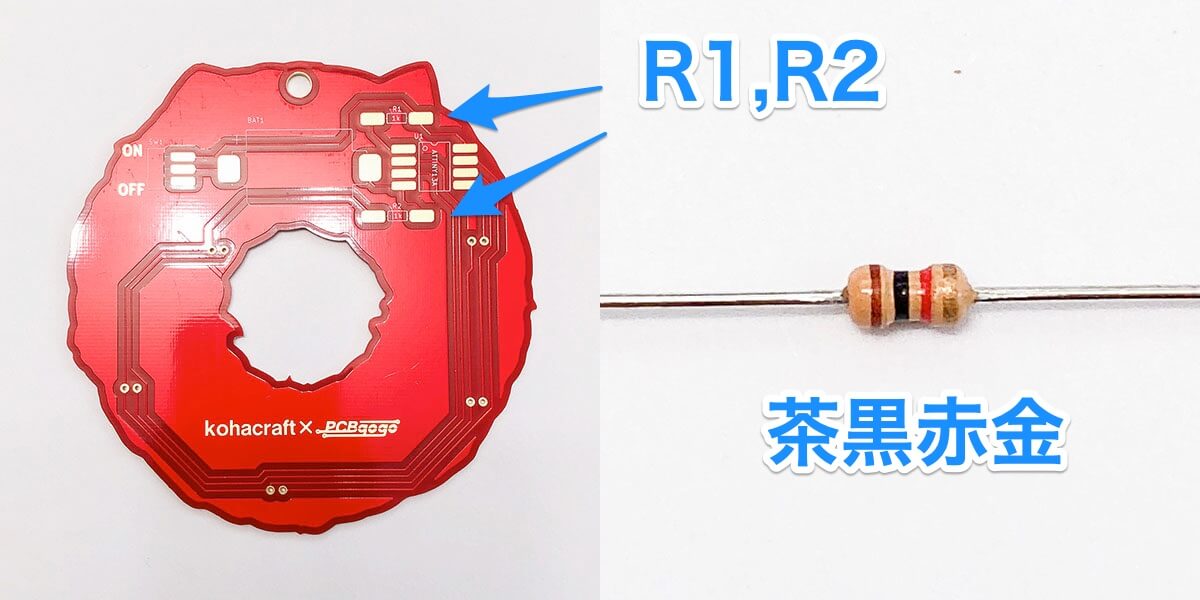
Attach resistors to R1 and R2. There is no orientation. Both R1 and R2 have the same resistance value.

(1) Place solder on the right side of the pad. Cut the lead of the resistor to a length of about 5 mm.
(2) Solder the resistor to the pad where the solder was placed earlier.
(3) Solder the left side as well, and cut the lead.

Attach a resistor to R2 in the same way.
Switch

Attach the switch. There is no orientation. Make sure the lead is facing the right side.

Mount it horizontally, like this.
Microcontroller
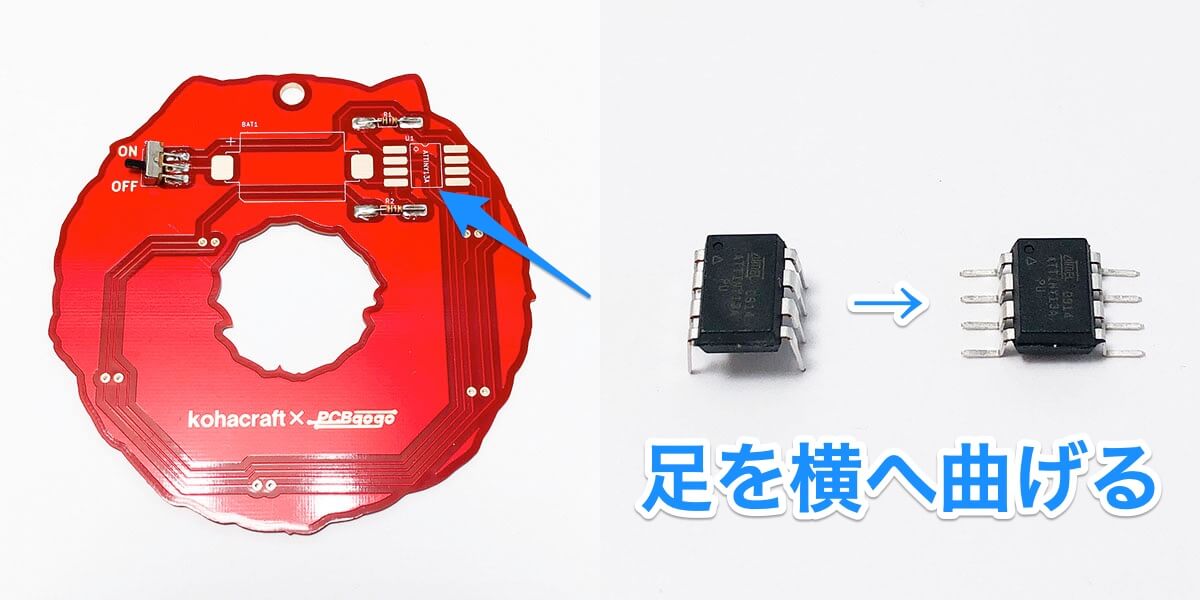
Bend the lead of the microcontroller to the side as shown in the picture.

The microcontroller has polarity. Mount the microcontroller so that the ● mark is positioned in the upper left corner.
Battery box

Mount it so that the + mark is positioned in the upper left corner.

The terminals are large, so be sure to put enough solder on them.
Finished soldering the back

This completes the soldering of the components on the back side of the PCB.
LED

Attach the LEDs to five locations on the surface of the board. Attach it with the left side facing the long lead.

Insert the long lead into the one marked "+" on the board.
To make sure the polarity of the LED is correct, after installation, make sure the shape of the metal inside the LED is larger on the right side, as shown in the figure above.
Insert batteries
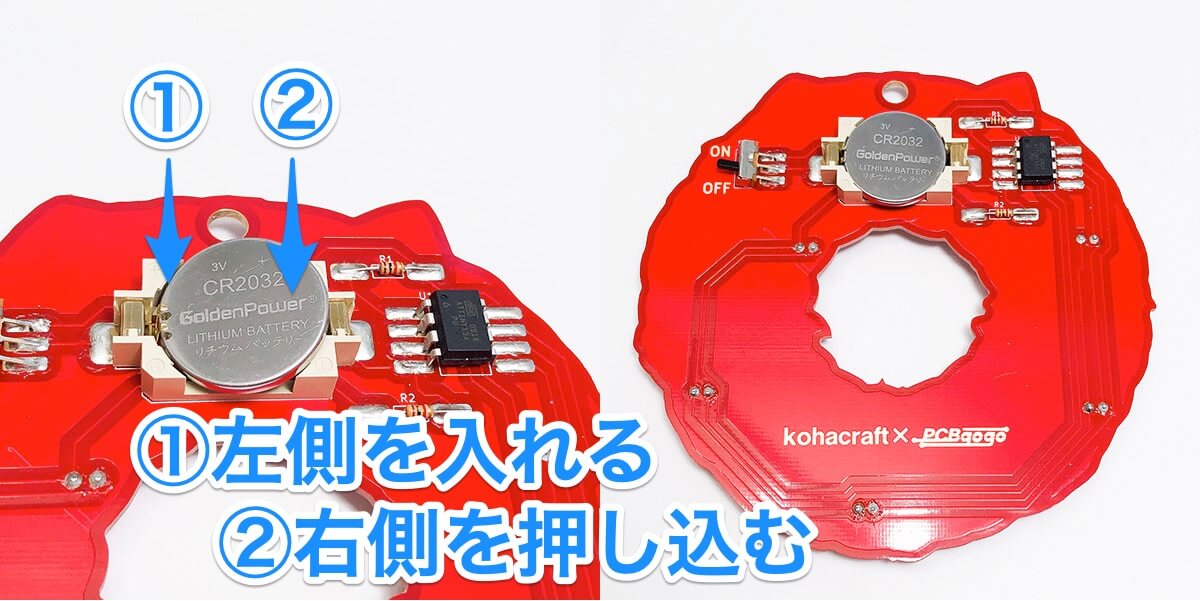
Insert the coin cell battery into the battery box. The side with the letters (+ pole) is facing up.
First, insert the battery into the left side, and then push in the protruding part on the right side from above.
Soldering complete

This completes the soldering process. Thank you for your time.
Done!!!
Tying the ribbon

Tie a thin ribbon through the hole at the top to complete the Christmas wreath.
Switch ON!
Try turning on the switch on the back. The LEDs twinkled. The battery will last for two to three weeks with the switch on. If it stops glowing, buy a CR2032 battery and replace it.
Troubleshooting
If the LED does not light up when the switch is turned on, please check the following items.
- Check if the batteries are in the wrong direction.
The side with the letters on it is the + pole. Please set it so that the + pole faces up. - Is the + pole of the battery box placed on the left side?
- Is the microcontroller's ● mark in the upper left corner?
- Check the 8 leads of the microcontroller for poor contact, and try to solder them again.
- Check if the polarity of the LED is correct.
Viewed from the side, the one with the larger metal inside the LED is on the right.
Let's decorate the wreath

Decorate your Christmas tree or front door to make it more festive.


