

I assembled two Nixie tube clocks with GPS in the form of alarm clocks.

Soldering

Solder the nixie tube to the photo coupler on the PCB of the main unit. I soldered the Nixie tubes with care because there are many leads and it is easy to make mistakes.


Modifying the alarm clock

We will disassemble the alarm clock. All the mechanical parts of the clock are not used.

Attach a corrugated cardboard called a flip board to the inside of the alarm clock.

After attaching the clock feet and bell, the modification of the alarm clock part is complete.

Installation of the PCB
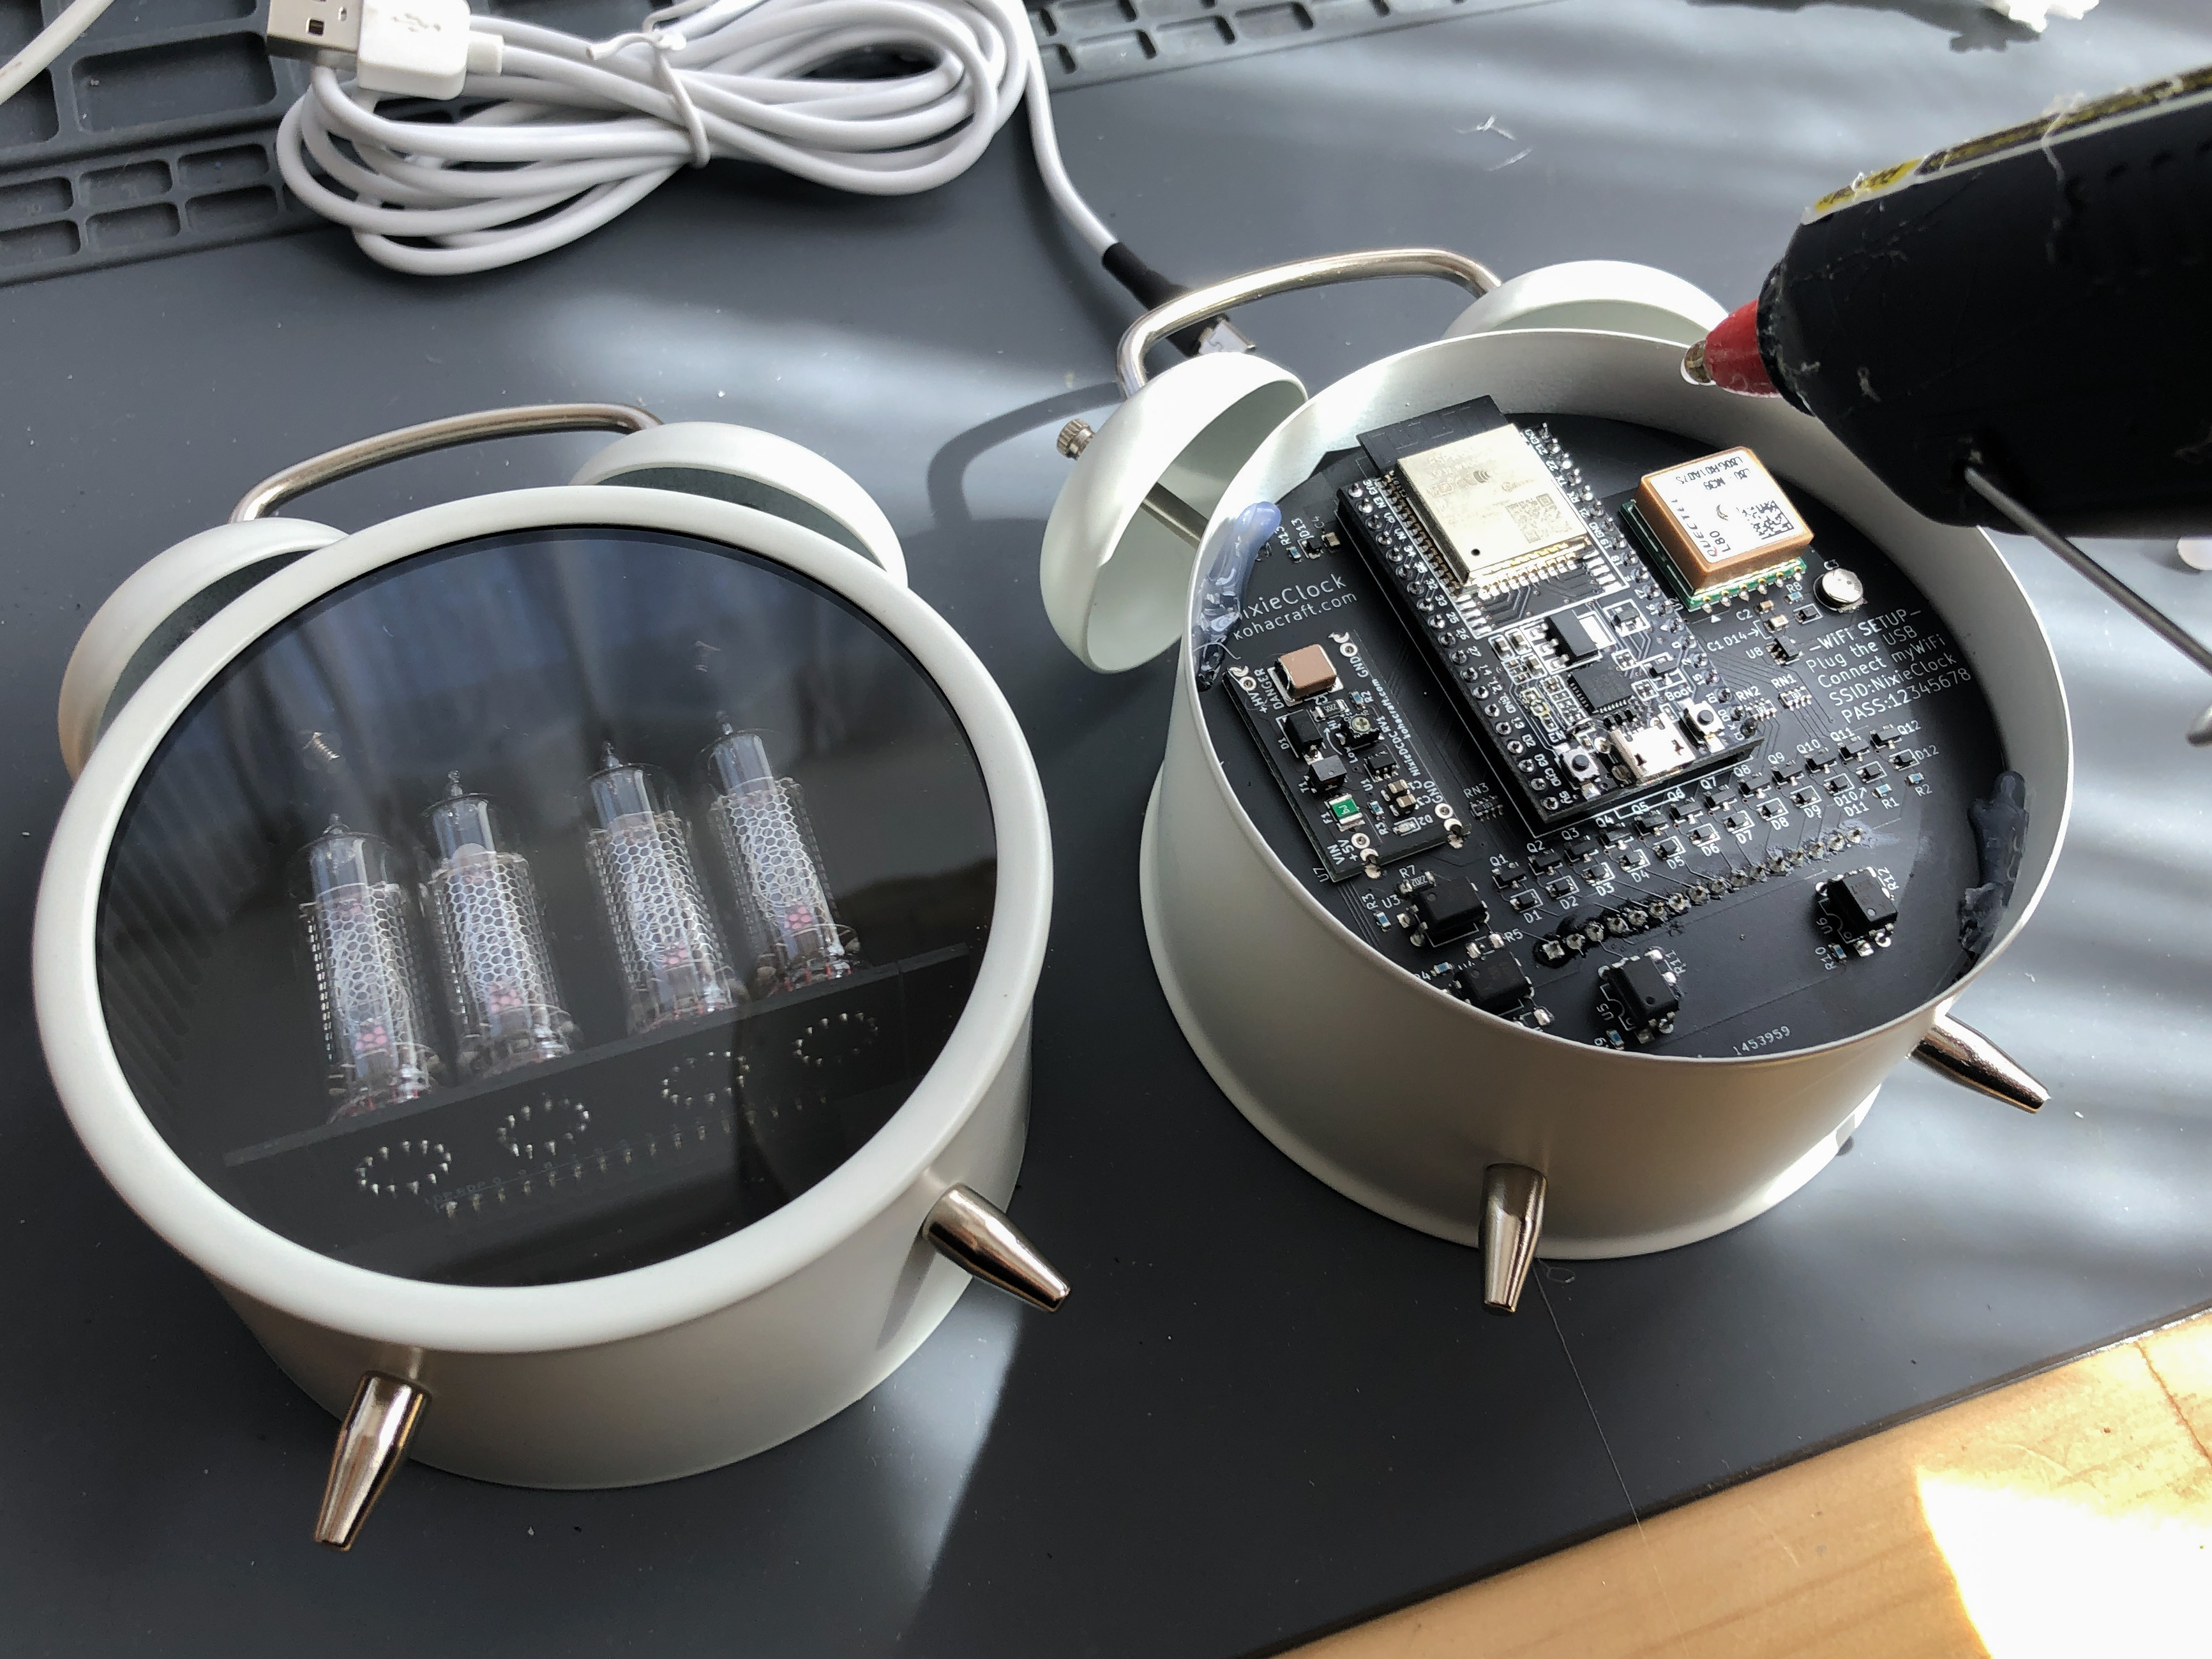
Place the assembled PCB inside the alarm clock and fix it with a hot glue.

Glue the back cover with hot glue and you're done.

Since the time is displayed based on GPS information, they both display the same time.
Completed alarm clock-style GPS clock
A cute little Nixie tube clock in the shape of an alarm clock is ready to go. The pendulum below the numbers is swinging slowly from side to side, which is cute.


